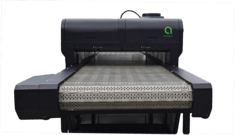
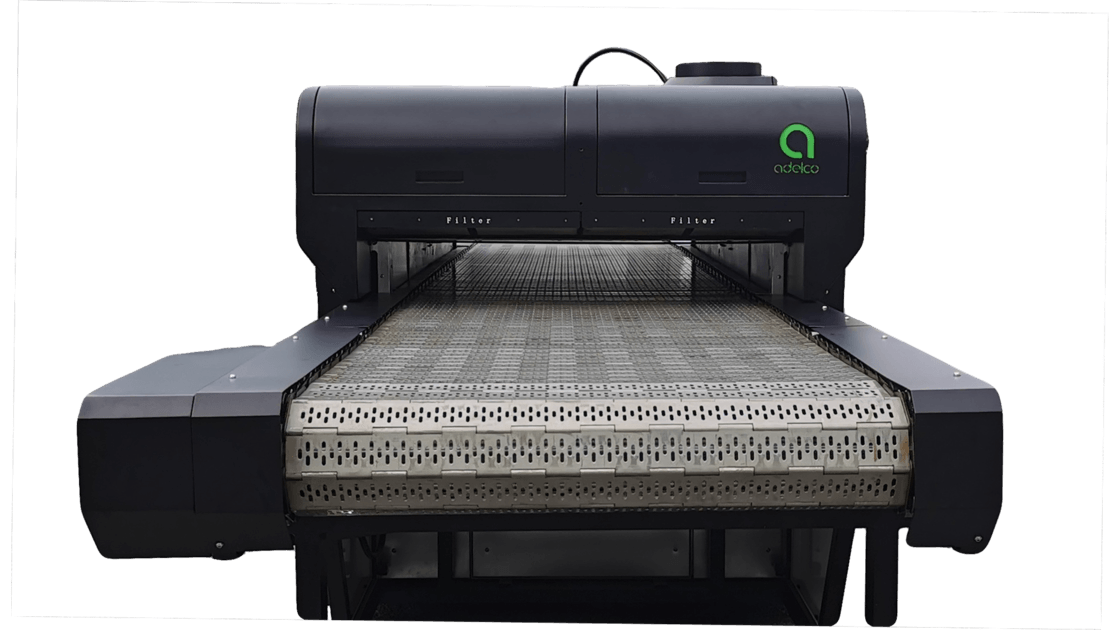

Pro-Cure Industrial Dryer
Curing Systems for three dimensional products including mugs, glass, plastic and metal objects.
Key features of the Pro-Cure Industrial Dryer
- Variable temperature control up to 180°C /350°F
- Gas or electric conveyor industrial dryer machine
- Built in infeed and outfeed fume extraction system
- Reduced energy consumption, low running costs
- Easy to clean, service and maintain
- Fast curing times
- Triple insulation with air curtain for the coolest exterior skin
- Ergonomically positioned and adjustable HDMI touch screen control panel interface
- Modular design for easy expansion
- Highly efficient extraction system
- Automatic start up and shut down procedure
- Various belt widths and oven lengths available
The Adelco Pro-cure Industrial dryer is a highly efficient and economical dryer for drying/curing a wide range of sublimation, screen and digitally printed substrates. This industrial dryer machine is suitable for virtually all types of screen-printing and digital inks including water based, solvent based and enamel inks and in other screen- printing and industrial applications, including mug and ceramic curing.
Designed and specified for advanced curing, the Pro-Cure Industrial dryer has an updated, efficient airflow and exhaust system, incorporating oven feed and exit extraction hoods to provide a cleaner working environment. As well as incorporating many of the popular features found in the flagship Pro-Cure Smart dryer.
Full features and advantages of the Adelco Pro-Cure Industrial
- Various belt widths available
- Unlimited oven lengths available
- Available as a Gas or Electric conveyor industrial dryer
- Easy to service & maintain with quick release panels & filters
- Digital automatic conveyor belt speed control
- Sophisticated touch-screen digital control panel interface
- Unique Hood extraction, helps prevent fumes escaping, providing a cleaner and fresher environment
- Triple insulation with air curtain for the coolest exterior skin
- Integral exhaust adjustment
- High Air flow for increased penetration, leading to faster curing times and giving unrivalled heat distribution
- Reduced energy consumption for low running costs
- Highly efficient, direct Ultra-Violet controlled burner system (gas models)
- Recycles clean filtered air and extracts contaminated air
FAQ's
- What is the best way of curing a print on a ceramic mug in high production?
-
The best way of curing a print on a ceramic mug in high production is to use a conveyor belt kiln. This type of kiln allows for multiple mugs to be placed on a conveyor belt and passed through a heated chamber where the print is cured at a high temperature. This method is efficient and allows for a large number of mugs to be cured at once, making it ideal for high production. Other methods, such as using a UV curing system or a heat press, may also work well for high production but may not be as efficient as a conveyor belt kiln.
- How to seal a design on a mug with a tunnel dryer?
-
- Begin by preparing your mug by cleaning it thoroughly and allowing it to dry completely.
- Next, place your design onto the mug, making sure it is centred and straight.
- Apply a clear sealant or varnish over the print, being careful not to apply too much or too little. This will help protect the print from fading or smudging.
- Place the mug into the tunnel dryer. Make sure that the temperature of the dryer is set to the appropriate level for the sealant or varnish you are using.
- Allow the mug to dry in the Adelco tunnel dryer for the recommended time specified by the manufacturer of the sealant or varnish.
- Once the mug has finished drying, remove it from the tunnel dryer and allow it to cool completely.
- Once cooled, check the print to make sure it is fully sealed and protected. If any areas appear to be missing sealant, apply another coat and repeat the drying process.
- Your mug is now ready to use and enjoy!
- What is the best tunnel dryer to cure ceramics?
-
The best tunnel dryer to cure ceramics would be one that is specifically designed for ceramic production, such as the Adelco Industrial Tunnel dryer. This dryer is designed for the curing of ceramics and has a variety of features that make it ideal for this purpose, such as precise temperature control, programmable firing cycles, and a high-efficiency insulation system.
Additionally, it is important to consider the size and capacity of the tunnel dryer to ensure it can accommodate the volume of ceramics being produced.
- How to use sublimation on a mug?
-
- Start by preparing your design. Make sure it is in a high-resolution format and that it is the correct size for the mug you will be using. You can use software such as Adobe Illustrator or Photoshop to create your design.
- Print your design onto sublimation paper using a sublimation printer. Make sure that the image is printed in reverse so that it will appear correctly on the mug.
- Carefully place the printed design onto the mug, making sure that it is centred and aligned properly.
- Cure your mug on an Adelco Industrial dryer. Make sure the temperature is set to the correct level for your mug (usually around 400 degrees Fahrenheit) and that the dryer is set to the correct time. The sublimation process typically takes around 3-5 minutes, but you should check the instructions for your specific mug to make sure.
- Once the heating process is complete, remove the mug from the conveyor belt and let it cool down. Once cooled, you can remove the sublimation paper and your design will be fully sublimated onto the mug.
- Repeat the process for any additional mugs that you would like to sublimate.
Note: It is important to use the right materials and equipment, such as sublimation ink, sublimation paper, and heat press, in order to achieve the best results. Always follow the instructions for your specific mug and equipment to ensure a successful sublimation process.
- Can you overheat sublimation on mugs?
-
Yes, it is possible to overheat sublimation on mugs. This can cause the image to appear distorted or discoloured, and can also damage the mug itself. It is important to follow the manufacturer's instructions for the specific sublimation process and the curing equipment , be that a tunnel dryer or heat press being used and to monitor the temperature and timing closely to ensure that the mug is not overheated.
- How long should you sublimate a mug for?
-
The time required for the sublimation of a mug can vary depending on the type of mug, the size of the design, and the heat press settings being used. Typically, a sublimation time of around 4-5 minutes at 375-400 degrees Fahrenheit (190-205 degrees Celsius) with medium pressure is recommended. However, it's best to consult the manufacturer's instructions for your specific mug and heat press for the most accurate time and temperature recommendations.
- How do you make writing on a mug permanent?
-
- For high production, use an Adelco industrial tunnel dryer. For consistent high-quality curing in an economic environment.
- For small quantities, there are a variety of methods to make writing and designs permanent:
- Use a permanent marker or paint pen: These types of markers and pens are specifically designed to write on ceramic and glass surfaces, and the ink is resistant to fading and washing off.
- Bake the mug: Once you have written on the mug with a permanent marker or paint pen, place the mug in a preheated oven at 350°F for 30 minutes. This will set the ink and make it permanent.
- Use an oil-based paint: Oil-based paint is also a good option for making writing on a mug permanent. Simply apply the paint to the mug with a paintbrush and let it dry for several hours before baking the mug in the oven for 30 minutes at 350°F.
- Use a ceramic pen: ceramic pens are designed for use on ceramic, porcelain and glass. They can be used to write, draw or paint on the mug surface. They are waterproof and heat resistant, so they are perfect for making permanent designs on mugs.
- Seal the design: After the mug is cooled down, you can use a clear sealant to protect the design from chipping or fading. Allow the sealant to dry completely before using the mug.
- What causes ghosting on sublimation mugs?
-
Ghosting on sublimation mugs can be caused by a few different factors, including:
- Improper cleaning of the mug before sublimation: If the mug is not properly cleaned and free of any oil or residue, it can result in ghosting on the final product.
- Incorrect temperature and time settings: If the temperature and time settings are not accurate, it can result in ghosting on the final product.
- Incorrect transfer paper alignment: If the transfer paper is not aligned correctly on the mug, it can result in ghosting on the final product.
- Incorrect pressure: If the pressure is not set correctly, it can result in ghosting on the final product.
- Using low-quality sublimation inks: If low-quality inks are used, it can result in ghosting on the final product.
- Using low-quality transfer paper: If low-quality transfer paper is used, it can result in ghosting on the final product.
- Using low-quality mugs: If low-quality mugs are used, it can result in ghosting on the final product.
- Which decorating method is best for mugs?
-
There are several decorating methods that can be used for mugs, including:
- Sublimation printing: This method involves using heat and pressure to transfer a design onto the mug. It is a popular method for creating high-quality, vibrant designs.
- Vinyl decals: This method involves using vinyl decals to apply a design to the mug. It is a simple and cost-effective option for creating custom designs.
- Hand-painted: This method involves hand-painting designs onto the mug using paint or glaze. It is a great option for creating unique and personalized designs.
- Screen printing: This method involves using a stencil and ink to apply a design to the mug. It is a popular method for creating large quantities of mugs with the same design.
Ultimately, the best decorating method will depend on the design, quantity, and budget for the mugs.
Make an enquiry now
Register your interest in the Pro-Cure Industrial Dryer now. We guarantee you won't be disappointed.
